The list of projects still to do continues to slowly diminish - it's looking like a moving date of between June 30 and July 5 is a pretty safe bet. I've been continuing to plug along on most of the weekends and here are some of the recent projects:
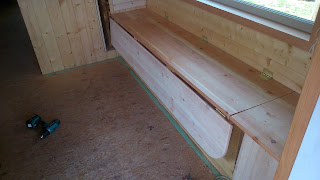
The "guest bed" is in place. I still have to get some foam and make cushions for it, but the fold up section is attached.
Here's what it looks like underneath. It has three support pieces that swing out to support it.
and this is what it looks like when not in use.
This is after finishing with Osmo polyx. It brings out the natural colour in the wood well.
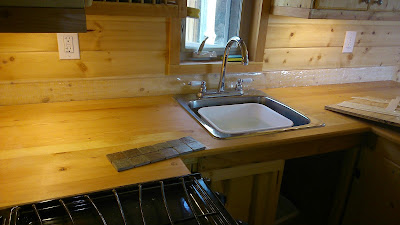
I added a small support for the counter overhang,
a door for the boot/shoe cupboard,
and did lots of finishing with Osmo and Varathane Diamond Coat. Neither of them are terribly bad smelling, but I'm rather sensitive to paint smells, so here I am looking like I'm ready to head for the trenches...
Handles are on all of the drawers
and doors.
The Electrical inspector came and was happy with most things. Unfortunately however, I had intended to use under-cupboard lights with low voltage feeds from a plug under the counter. I then found lights that have the transformer in the light itself, so the connection is high voltage AC current. The wires I used were wrong and I had to replace them with larger and apparently more suitable wires. This involved drilling some holes in the wall and doing some wire fishing. It turned out OK though - so hopefully he will be happy with it this time.
One of the new wires, now outside of the wall and inside shielding.
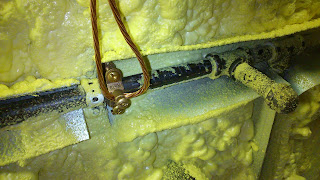
I also had to add a ground wire from the electrical box to the gas pipe under the floor. This is the clamp for around the pipe and the connector for the frame of the trailer.
Here's the line with the wire clamped in place,
and here is the frame connection.
This is a shot of the blown foam insulation under the trailer, and the gas line running down the middle.
The tile back-splash is installed. This shows the first step, which was to sand the wall and then apply these cool tile glue pads.
I just discovered these. They make gluing tile on much simpler as you just peel and stick. They're supposed to be just as good as the more difficult glue you spread on. Hope so...
Grouting messily in progress.
Tiles in place and grouted. Not sealed yet though.
Last on the list so far is the porch ceiling. This was another of the "dreaded" jobs as there are compound angles and difficult places in abundance.
Thanks to my father's help, we got it done today though.
I haven't decided yet if I should leave the ceiling the natural colour, or if I should paint it the same colour as the outside of the house. So far, I have two votes for natural and none for colour...
That's it for now. Still to go - a corkboard and frame on the wall beside the desk, a bathroom mirror, railings on the deck, a box on the tongue to hold the external plug-in wire, break lights and running lights, the floor of course, and various other small finishing sorts of things. Quite a bit to do - but the list is definitely shorter!


