Monday, June 15, 2015

Finally the Floor

The last big project is done!  Like many things in a tiny house, the floor is small but it was probably as time consuming to install as a floor in a much larger house due to all of the small spaces and many nooks and crannies.  Here's what it looks like though:

 
Getting the underlay down


 Nearly running out and piecing little pieces together to finish the last bit


The first line of flooring is established here


 The line is growing...


 and all done. It happens so much more quickly in pictures!  Here's the bathroom,

and the view from the deck.

Another project this weekend was to finish the area around the desk. I decided to cover the plywood wall partially with pine and then made a frame for a cork bulletin board. The cork is glued on with contact cement. 

Stay tuned - moving day is near!   ...and then will come the great sorting saga - what will fit and what won't  :-)

Sunday, June 7, 2015

More Projects

The list of projects still to do continues to slowly diminish - it's looking like a moving date of between June 30 and July 5 is a pretty safe bet. I've been continuing to plug along on most of the weekends and here are some of the recent projects:

 The "guest bed" is in place. I still have to get some foam and make cushions for it, but the fold up section is attached.

 Here's what it looks like underneath. It has three support pieces that swing out to support it.

and this is what it looks like when not in use.

This is after finishing with Osmo polyx. It brings out the natural colour in the wood well.

 I added a small support for the counter overhang,

a door for the boot/shoe cupboard,

and did lots of finishing with Osmo and Varathane Diamond Coat. Neither of them are terribly bad smelling, but I'm rather sensitive to paint smells, so here I am looking like I'm ready to head for the trenches...

 Handles are on all of the drawers


and doors.

The Electrical inspector came and was happy with most things. Unfortunately however, I had intended to use under-cupboard lights with low voltage feeds from a plug under the counter. I then found lights that have the transformer in the light itself, so the connection is high voltage AC current. The wires I used were wrong and I had to replace them with larger and apparently more suitable wires. This involved drilling some holes in the wall and doing some wire fishing. It turned out OK though - so hopefully he will be happy with it this time.

One of the new wires, now outside of the wall and inside shielding.

 I also had to add a ground wire from the electrical box to the gas pipe under the floor. This is the clamp for around the pipe and the connector for the frame of the trailer.

 Here's the line with the wire clamped in place,

and here is the frame connection.

This is a shot of the blown foam insulation under the trailer, and the gas line running down the middle.

 The tile back-splash is installed. This shows the first step, which was to sand the wall and then apply these cool tile glue pads.

 I just discovered these. They make gluing tile on much simpler as you just peel and stick. They're supposed to be just as good as the more difficult glue you spread on. Hope so...

 Grouting messily in progress.

Tiles in place and grouted. Not sealed yet though.

Last on the list so far is the porch ceiling. This was another of the "dreaded" jobs as there are compound angles and difficult places in abundance. 

 Thanks to my father's help, we got it done today though.

I haven't decided yet if I should leave the ceiling the natural colour, or if I should paint it the same colour as the outside of the house. So far, I have two votes for natural and none for colour...

That's it for now. Still to go - a corkboard and frame on the wall beside the desk, a bathroom mirror, railings on the deck, a box on the tongue to hold the external plug-in wire, break lights and running lights, the floor of course, and various other small finishing sorts of things.  Quite a bit to do - but the list is definitely shorter!

Sunday, May 3, 2015

Drawer fronts and a refrigerator. Finally.

The past two weekends have been occupied with one task that I have been avoiding, and another that seems to have been trying to avoid me.

I've made a total of twenty two drawers now, of various sizes, and all of them needed facing boards so that they would look a bit more finished. I was kind of dreading this and so put it off for a long time.

Part of the reason I was dreading it was that I had planned to make the facings from wide fir boards that I have, and that would have required a lot of cutting, planing, and trying to find pieces without cracks that would fit the spaces.

I simplified things a bit by using commercially laminated pine panels for the wider drawers, and just some nice 2 x 8's and 2 x 6's for the narrower ones. This sped things up a bit.

I used the same router edge that I've been using for the cupboard doors, and so that simplified things a bit as well. Once I got started, it wasn't actually as bad as I had expected. Many things in life seem to be that way actually..
 Bathroom.


I've already posted this picture, but I'll put it in again since we're talking about drawers and drawer fronts.

 Kitchen drawers, and a tool cluttered counter top.

File drawer under the back of the  kitchen counter.

 Under the oven.

The task that seemed to be avoiding me had to do with obtaining a refrigerator. I had found, with great difficulty I might add, a refrigerator that was what I considered to be a perfect size for the space that I have. Made by Avanti, 24" wide, 24" deep and about 60 inches high, with 7.4 cubic feet of refrigerator/freezer space. I built the space by the pantry with the intention of putting this refrigerator in it. However, Avanti has some rather large difficulties with distribution in Canada it would seem. After more than eight months of waiting a refrigerator finally arrived - in Terrace (about 4 to 5 hours drive from here). And it was white. I'd ordered the stainless steel look. I decided to change plans.

Every other small fridge I could find was over 26" deep, which didn't fit in my space. So I decided to lower my expectations a bit and go quite small. Here is the result:

This is a 4.5 cubic foot bar fridge made by frigidaire. It's pretty small, but since there's only one of me maybe it will be OK. It will certainly diminish the number of items that get lost in the back and attempt to develop into new life forms. That's probably a good thing.

The space had to be redesigned to fit the new fridge. It provided quite a lot of extra storage space.
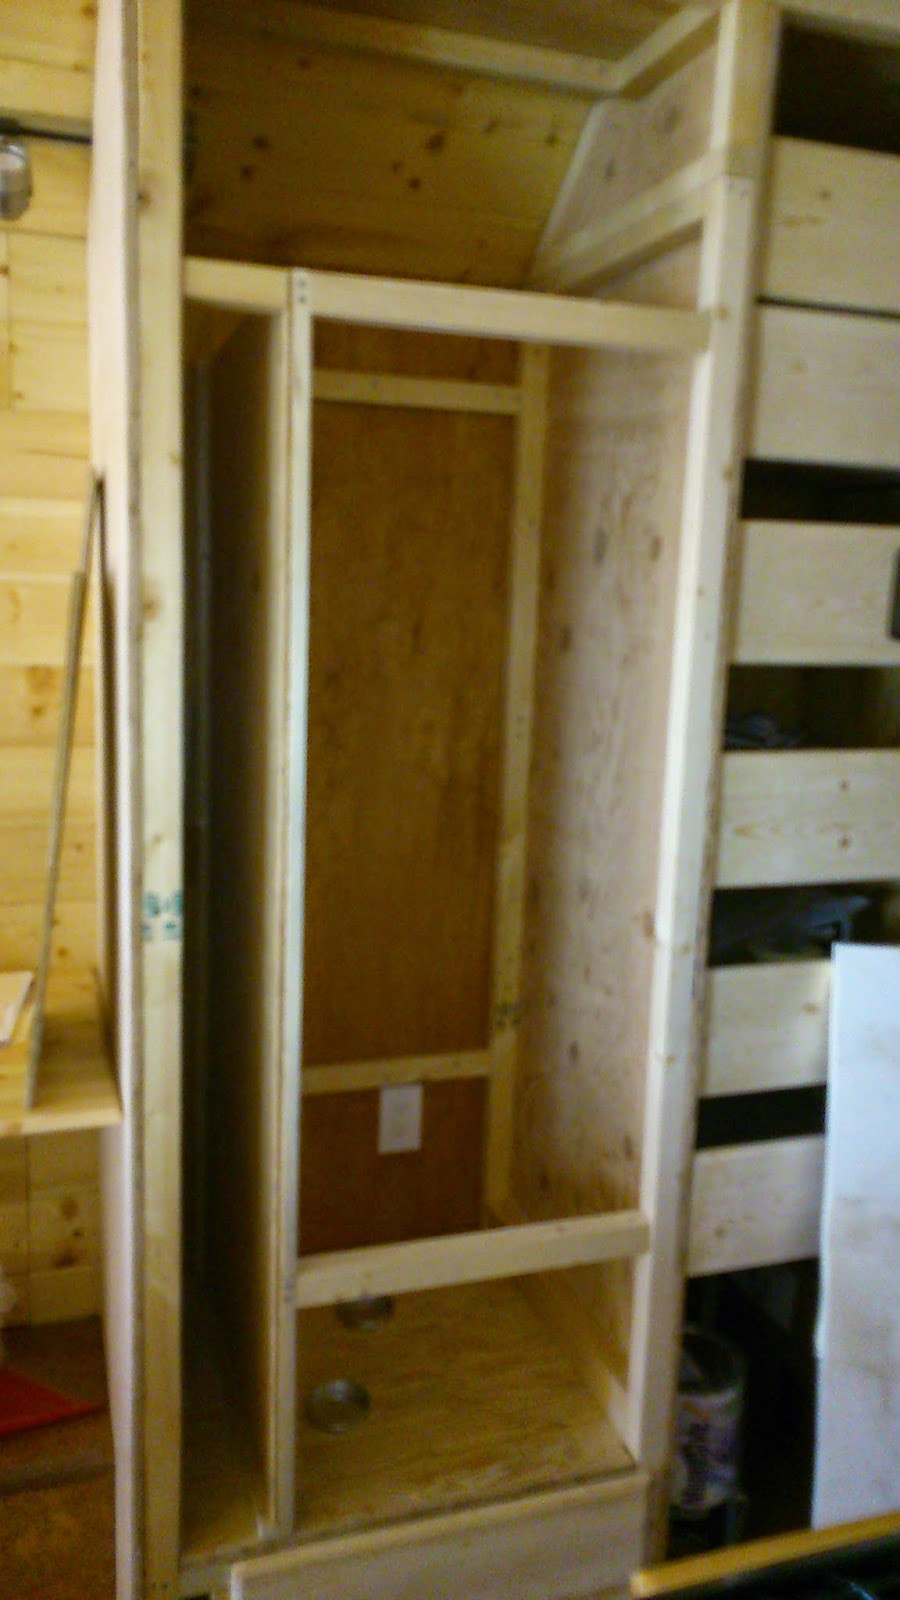
This picture shows the roughed in new framework. There is another large drawer under the fridge, a tall slender space beside it for tall slender things - like a brooms and dowels for the table - and a larger shelf above.

 There is some extra here - but I also added foam insulation on the sides as extra noise barriers and also to add a little bit of extra insulation to the fridge.
Here the refrigerator is in its new home and the doors have been installed for the shelf above. I faced all of the edges with thin strips of fir that I cut and planed down to about 1/4 inch. This is started here.
This picture also shows the drawer facings for the pantry shelves. Still big spaces between, but it helps a little.

 The new, and LAST! drawer.

The finished space with doors, drawers, drawer faces, facing strips, and refrigerator. The plastic is still on the fridge front as I have to paint sealant on all of the wood still.

 One other little task was installation of a sliding door for the closet. It's a bit flimsy and made of vinyl, but it's light and compact and takes up very little space when fully open.

Not exactly a natural look, but it closes the closet and blends in well enough.


Monday, April 20, 2015

Finishing the Bathroom

It was a busy weekend this weekend, but it ended with a successful sort of feeling, as if I'd accomplished a few things. This has certainly not always been the case, so it's nice when it happens from time to time.

I went to a local muffler shop - Dad's Mufflers - to see about getting my piece of 3/4 inch copper pipe bent. He's always been really helpful, and it has a comfortable "old time" sort of feel there. He said he didn't bend that sort of pipe, but he had a hand bending tool and I was welcome to do it myself. Fortunately, he was also having coffee with a fellow who said I'd better go and fill my pipe with sand first. Turns out this works really well to keep the pipe from crimping and collapsing when you bend it. So, now I have pretty snazzy shower curtain rod. I also shined it up with steel wool and then put Varathane Diamond Coat on it to keep it from tarnishing.

 I know this is stating the obvious, but here we have the curtain closed,

 and here it's open.  :-)

I also finally got started on drawer fronts and was able to finish the bathroom cabinet - except for Varathane and drawer pulls.

The backsplash is also finished around the edge of the cabinet. I used small pieces of shale rock and shaped them to fit the space with an angle grinder and masonry wheel.

I used clear silcone to set them in place. I'm not sure if this is a good idea yet - it's simple, works really well initially, glues things in place, seals everything, and looks pretty good too. Time will tell if it's a good idea or not in the long run. Hopefully it will last for a while.

I also added a small LED light bar going up the corner. I'm not sure if it will give enough light yet, but it's pretty compact. I don't like looking at the bright little LED spots though, so I added a thin strip  of wood up the side to block direct vision of the light. It's wired so the plug it is plugged in to is operated by the switch above the sink. I need to find a mirror to go beside it.

 The first bit of colour in the house. I don't think this picture, or maybe my computer screen, captures the colour completely accurately, but it is supposed to be kind of rosemary green. It looks pretty good, despite what may appear here.

Since I'm hoping to have cork flooring throughout the house and cork isn't great in chronically wet areas, I decided to make a concession for the chronic problem of floors rotting under toilets. I put in a piece of the vinyl sheeting I used for the shower stall as the floor base and siliconed the heck out of it. No leakage here!


This isn't common practice, but I decided if I'm going to seal things up, I'm dang well going to seal them up! So I siliconed any spare holes in the toilet flange and put scads of plumbers putty around the toilet bolts. If this floor gets wet, it's not going to be for lack of preparation!

Another possibly useful little tid-bit of information: I installed a toilet flange that had a plug in it to close the hole until I was ready to install something on top of it. I thought the plug would just pull out. It doesn't. They have to be cut out with a jigsaw. Follow the outside rim of the plug with the blade.

And here is the toilet. Not sure I'll keep the wood seat yet. It kind of grows on you though.

A little confessional note: I have previously posted that I intended to use a composting toilet. I experimented with the bucket type for a short time, but found that my bathroom was smelling like it was inhabited by a really, really big hamster. I think urine separation would help, and also maybe a better composting sawdust mixture. However, since I'm going to be in a place with an easy connection to a septic system, no water shortage, and no real reason to use a composting toilet, I kind of gave in on this.

 Another little task was to put the dowel in to hang clothes from. I decided to add some pegs for all the things that one wants a hook for, so used a board at each end and drilled some holes at an angle, then glued in small dowels.

 Here's the other end.


The closet is already a bit of a mess in this picture, and I don't even have much in it yet. There will be a door, however. I'm just going to use a sliding/folding door. Hopefully the plastic wood colour won't clash too much with everything around it.

And, finally, the drip plate trial number three - extended version. I added half an inch and moved the point about two inches away from the wall. No more splatters, splashes, or misses. All drips hit the sink!

That's a wrap for last weekend. On to kitchen and front room things next weekend.